|
TT/NF Gear Ratio Spreadsheet 18KB (right click to save)
STEERING LINKAGE:
This is what makes the bike driveable. Without this properly setup
you will always suffer handling problems. Here is the BKM (Best Known Method) for setting up the steering linkage:
1) Use the stock steering shaft, but ditch the silicone tube.
Replace this with the Nuova Faor spring steering linkage kit (NX80A). This basically consists of a slider, screw to mount slider on servo, and two identical pen
springs.
2) First make sure that the steering ball cup can freely pivot on the
ball located on the top triple clamp. If it binds, attach the ball to a dremel and spin it while the steering
shaft cup is on it. This should loosen it up in a few seconds. Then attach it back on the triples.
3) Slide items on the other end of the shaft in this order: setscrew stopper,
spring, slider, spring, setscrew stopper. Don't tighten down the stoppers too much at this stage.
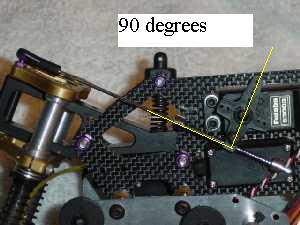
4) Position the steering shaft and center your servo using your transmitter
steering trim so that the servo horn is perpendicular to the shaft (see picture below). When it's right, attach
the slider onto the servo horn. Make sure it's secure but still free to pivot.
5) Center the triple clamps and initially tighten the setscrew stoppers to
the positions where there is barely any preload on the two springs.
6) Rotate the steering head and the shaft should rotate with it. The servo
should just barely move (or not at all). Make sure the shaft doesn't foul on the chassis. Mount body and rider and make
sure the shaft doesn't foul on these items as well.
7) Remove the rider and test drive. If it handles really quick this is bad,
because the springs are too hard. Replace springs. If it barely turns at all, this is a start! Bring the bike back in and
little by little bring the stoppers in on the springs to create preload. Adjust them to the point where it responds yet there
is still a decent amount of play in the steering. If you've tightened the stoppers all the way down and still not that much
response, consider harder springs.
8) When the response is how you want it adjust the steering trim and/or left/right
bias by loosening the stoppers and moving the spring assembly (while still keeping the same tension from step #7) for big
adjustments. For small adjustments use your transmitter trim. Remember that it is very tough to get good steering trim
AND good left/right bias at the same time due to weight distribution, etc. There is usually a compromise between the two.
We prefer good left/right bias for race purposes.
STEERING SHOCK:
For a really smooth and cheap (if you have one sitting around)
steering shock you can use the front or rear shock from a 1/10th scale buggy. Drain all of the oil and only use a couple drops
of it inside for lubrication.
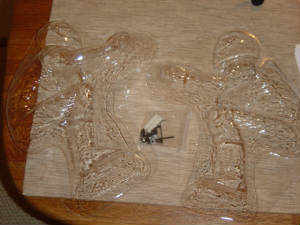
REALISTIC LEXAN RIDERS:
Motoproto of rcgroups makes an incredible rider set for the bikes. They sit
more upright, have detailed hands, and come with secure mounting hardware. You can reach him at the rcgroups forum.
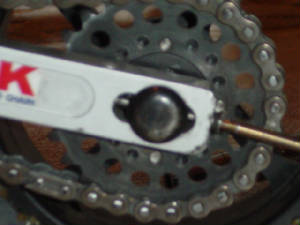
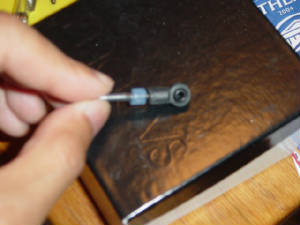
ADJUSTING CHAIN TENSION:
The chain tensioner from the factory has a little spring and screw attached
to the swingarm. The correct way is much different! throw away this screw and spring and get a much longer screw - long enough
so that it touches the back wall of the other side. Loosen the big 4mm nut holding the rear tire and push the tire towards
the frame. Then with a screwdriver twist on the screw until the tension is how you want it. Make sure you remove the
long screw or threadlock it in place.
TIRES:
One of the first things new TT owners
should replace is the stock tires. The pointed profile of the front stock tire and the lack of grip on the rear tire don't
really handle well. Replace them with either the NF treaded tires (soft, medium, hard), GRP treaded tires (45 or 50 shore),
or PMT slick tires.
Also make sure you glue them onto
your rims. Using regular CA glue works but doesn’t last very long after several runs. Use Loctite 480. Or you can try
using Shoo Goo on the rims. Spread the gel into the bead using a toothpick and let the glue cure overnight. Then the tire
should last at least twice as long. The only drawback is that Shoo Goo doesn’t work as well at higher temperatures (like
in Las Vegas for example).
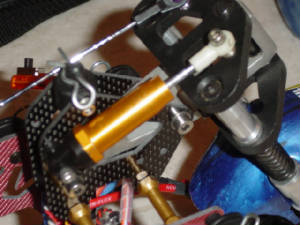
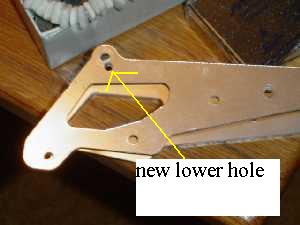
CRASH BARS:
Move them up
and back (see picture for drilling new hole locations) in order to keep the bars along the bike’s center of gravity
and avoid “washing out” the front wheel during high speed cornering. Also with the stock plastic mounts the bars
can easily fall out, so instead of gluing them in, you can drill out a 4-40 hole and tap the hole. Then use a setscrew to
hold the bar in place. But the drawback is that the hole can easily strip out! For a more rigid connection try using four
BRP Wing Mounts #5245 as seen here. Also for more rigid bars use 3/32”D K&S steel wire and bend it into shape using
a vice and pliers.
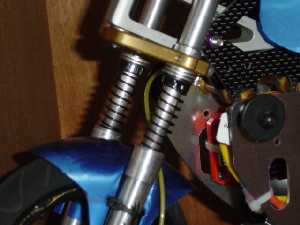
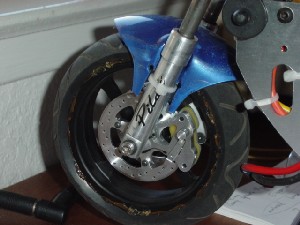
FRONT FORK BINDING:
The design of the traditional "non-USD" fork system on the 1/5th scale allows
for binding. This is the condition where when you tighten the axle screws, the forks bend in to create a slight "toe-in" angle.
Then when the forks are pushed up, they wedge in and get completely stuck to eliminate front suspension altogether and also
ruin your front ride height. The BMRC (BritishMotoRacingClub) has developed a cheap mod to fix this. Check it out at http://www.rcbikes.org.uk/ under the Hints&Tips section.
What you can also do to keep the forks aligned is add another set of springs
on the outside so that the forks don't compress as much. Install a pair of black micro VCS shock springs from Associated
(#4475) right below the triple clamps.
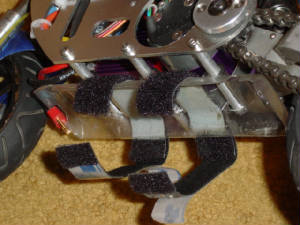
BATTERY MOUNTS:
The rubber band
method of securing the batteries is pretty good, but it can be a hassle at times because you must regularly stretch the bands
to get the batteries in, then they eventually break! A much more convenient way to strap in your batteries is to use two long
strips of velcro and wrap them around the battery tray. This makes for easy battery swapping.
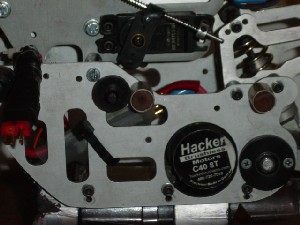
BRUSHLESS MOTOR & GEARING:
For the 1/5th scale bikes we have settled upon using brushless motor systems
for increased power, run time, and low maintenance. Most widely used models are the Novak Super Sport system for mild applications
and the Hacker C40 8T for wild applications. Able to wheelie on command with the latter system.
Stock gearing works well with these systems, but for a little more speed try
lesser tooth sprockets from Crazy Nut Racing. If you're ever in doubt on what gearing to use, always start from stock and
work from there.
REAR SHOCK LIMITER:
After you fully compress the rear shock while on the bike
you'll notice that it actually compresses a bit too much, resulting in the rear tire scraping up the mudguard and receiver
tray. This can happen regardless of how much preload you use. One way to limit the amount of shock travel is to cut a 2-4mm
piece of fuel tubing and slip it onto the shock shaft. This creates a soft stop and saves your mudguard.
REAR SHOCK BOUNCE:
Here is another way to
mod the rear shock by limiting the rebound. This is also known as droop. Open up the shock internals and put a spacer right
underneath the piston and above the internal body spring. This will eliminate some bounciness of the rear (also see this at
http://www.rcbikes.org.uk/ under the Hints&Tips
section). However this also shortens the length of the shock. To bring the rear back up to stock length you'll need
to drill another shock upper mounting hole right below the stock position. Also with this you'll notice that you don't have to do the "rear shock limiter" mod above.
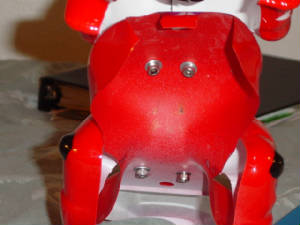
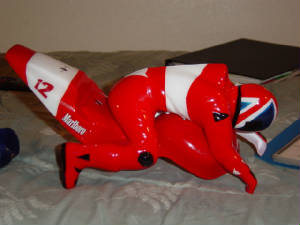
LEXAN RIDER:
When racing, the last thing you want is the rider to wobble, let
alone fall off! Here's one way on how to secure the lexan rider to the seat.
1) First make a trial run on how you want the rider to sit on
the seat.
2) Then make a couple of 4mm+ holes on both the tank and seat
of the upper body around the positions of contact.
3) Position the lexan rider on how you want it (make sure the
rider's arms don't foul on the steering head and that the rider's head doesn't foul on the windshield) and make marks through
the body holes onto the rider.
4) Drill the corresponding 4mm+ holes onto the rider.
5) Now secure the rider to the tank and seat using long 4mm screws,
washers, and nylon nuts. The tricky part is getting your pliers to grab onto the nylon nuts inside the rider. And you're done!
Now you can treat the tank and rider as one solid unit.
FORK SPACERS:
Depending upon your preference, the front end could use a little bit more height to avoid scratching up the sides of
the lexan body during cornering at full lean. One way to do this is to screw the rake screw in all the way, but this decreases
straight line stability. Another way is to put several washers in between the bottom triple clamp and e-clip on the shaft.
This helps to keep the rake at a decent angle. 4mm of washers is generally a good starting point for this. However make sure
that the flat head screws securing the top of the forks are long enough to sufficiently thread in.
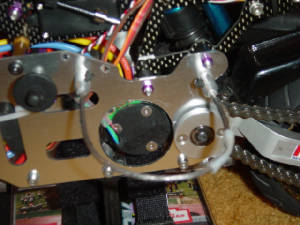
FRONT BRAKE SYSTEM (FOR ELECTRIC
BIKES):
Pictured here are Pat's front brakes.
Important point here is that the option front brake system is not necessary to be fast on the track or to win a race. Really
it will depend on your method of cornering. Rear wheel only braking done via the ESC is better if you prefer to drift
the bike around hairpins. In this case you would go into the turn hot, mash on the brakes to slide the rear and rotate the
bike, let off the brakes slowly to get in control, and then gun it down the straightaway. For others however it might be advantageous
to run with some sort of front braking system because added stopping power. This can reduce your sliding ability (depending
on your front brake strength) but you can now brake a little bit later than everybody else. For
the most optimum brake feel we have settled upon 60% rear and 40% front braking.
Note: Nope you cannot do stoppies
with the front brake. Not with R/C bikes in general.

DRIVE
SHAFT SERVICE:
From Ron O. of the club, and from Steve B. of rcgroups - one downside of
the single driveshaft system on the 1/5th scale bikes is the setscrews for the drive sprocket and spur gear coming
loose. Good start is to thread lock them in and tighten them everytime before you run the bike. Use a good quality allen wrench,
not those "L" wrenches. Also, make sure you tighten the setscrews on the flat spot of the shaft (there is a flat spot for
both components). To find the flat spot, take the setscrews completely out and look through the hole under a lamp. The flat
spot for the other side is in the same line, so to easily spot them again while assembled on the bike draw a line right
through the center with a bright permanent marker.

Last updated 3/14/06
|